
Did you know that old furniture often takes up space, wastes potential, and contributes to landfill overflow? That’s where upcycled furniture ideas come to the rescue!
Upcycling is basically taking an item that might not be fit for purpose anymore, has become dated, or could frankly just be better, and fixing, changing, or decorating it. Instead of spending hundreds—or even thousands—on new furniture, you can make dramatic updates with minimal costs using basic tools and materials.
As we’ve seen a surge of interest in upcycling furniture, I’ve learned that even beginners can create beautiful pieces. The best part? Old furniture is often better made than the equivalent flat-packed furniture we get today. Furthermore, these days we’re spoiled by products on the market which make upcycling quick, easy, and affordable.
In this beginner’s guide to upcycling furniture for beginners, we’ll explore DIY upcycled furniture ideas that require no power tools. Whether you’re interested in simple upcycling furniture projects like turning headboards into benches (one of the most popular searches on my site!) or transforming smaller items first to build confidence, this guide has you covered.
Why Upcycling Furniture is Worth It
Upcycling furniture is more than just a trendy DIY activity—it’s a practical approach that benefits both your wallet and our planet. Let me show you why it’s worth your time and effort.
Save money and reduce waste
Upcycling is significantly more budget-friendly than purchasing new pieces. A quality item that would cost hundreds or thousands new can be transformed for just the price of supplies and your time. This approach is particularly valuable when decorating on a tight budget, as older pieces can often be found at remarkably low prices.
Additionally, each year Americans throw away about 12 million tons of furniture and furnishings, with roughly 9 million tons ending up in landfills. By giving old furniture new life, you’re actively preventing usable items from contributing to this massive waste stream.
Create one-of-a-kind pieces
When you upcycle, you’re not simply reusing materials—you’re telling a story. Unlike mass-produced items that millions of others own, upcycling allows you to create something truly unique that reflects your personal style.
“With upcycling, you create a unique piece which has its own story,” notes designer Ilori. “There’s a layering of meaning and history and you’re going to cherish that piece”. This emotional connection means you’ll likely keep these items longer, even repairing them when necessary rather than discarding them.
Avoid fast furniture and landfill overflow
Similar to fast fashion, “fast furniture” refers to mass-produced items made from poorer-quality, plastic-based materials designed for short-term use. These pieces typically last only a few years before being discarded, contributing to our growing ecological crisis.
Consequently, choosing to upcycle helps combat this throwaway culture. Many upcycled items are vintage or solidly built older pieces that were made to last in the first place. Unlike contemporary furniture built with veneer and cheap chipboard, older pieces were often manufactured with solid wood, designed to withstand years of use as long as they’re properly maintained.
By extending the life of quality furniture pieces, you’re helping create a more sustainable and circular economy while expressing your creativity through one-of-a-kind home furnishings.
Read other Articles – Quick Guide: How to Build SEL Activities for Better Student Connection
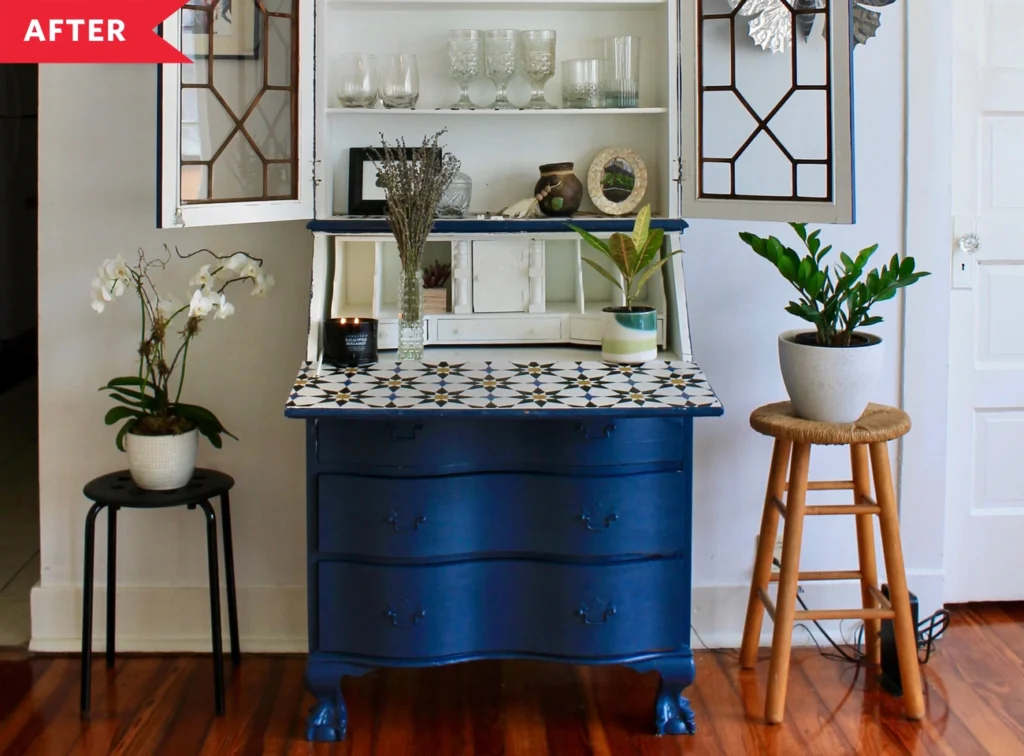
How to Start Upcycling Without Power Tools

Image Source: Artsy Chicks Rule
Starting your upcycling journey doesn’t require an expensive workshop full of power tools. Indeed, some of the most beautiful upcycled furniture ideas come from simple techniques using basic supplies. Here’s how to begin:
Pick beginner-friendly furniture pieces
Look for furniture that’s structurally sound first and foremost. Even if it appears worn or dated, a solid foundation is essential. For your first projects, start small with items like side tables, chairs, or stools to build confidence. Specifically, search for solid wood pieces as they’re generally easier to work with and more durable than laminated or veneer-covered options.
Clean and prep with basic supplies
Thoroughly clean your piece before starting any transformation. Old furniture often hides layers of dirt, grime, and residue that can prevent new finishes from adhering properly. A simple cleaning solution of mild soap and water works for most pieces, though stubborn grime might require a deglosser. This crucial step eliminates the need for heavy-duty sanding in many cases.
Use hand tools like screwdrivers and sanding blocks
You likely already own most tools needed for furniture upcycling:
- Screwdrivers for removing hardware and making repairs
- Sandpaper in various grits (120-220 for most projects)
- Sanding blocks for even pressure and reaching corners
- Pliers for removing tacks and staples
Primarily, these basic hand tools can accomplish what power tools do, albeit with more time and effort. Household items can often substitute for specialized tools – butter knives work as scrapers, and jars make excellent paint mixing containers.
Choose easy-to-use paints like chalk paint
Chalk paint has revolutionized furniture upcycling for beginners since it typically requires no priming or sanding beforehand. This matte-finish paint adheres to most surfaces, even glossy ones, and dries quickly (usually within an hour). After applying 2-3 thin coats with a quality brush, finish with wax to seal and protect your work. The entire process can often be completed in a single day, making it perfect for weekend projects.
Read other Articles – How Leading Companies Cut Incident Rates Using Best EHS Software
8 Easy Upcycled Furniture Ideas (No Power Tools Needed)

Image Source: Apartment Therapy
Ready to transform old items into gorgeous new pieces? These eight upcycled furniture ideas require minimal tools yet deliver impressive results.
1. Turn a chair into a plant stand
Remove the chair’s seat, line the opening with chicken wire, and secure with staples. Add a burlap coffee sack over the wire, fill with potting soil, and add your favorite plants. This creates a charming garden accent that gives neglected chairs new purpose.
2. Make a nightstand from a bar stool
Transform a wooden bar stool into a practical nightstand by simply adding an extra shelf. Wrap jute twine tightly around the lower rungs to create a sturdy shelf for books or decorative items. Paint the stool in a color that complements your bedroom for a custom look.
3. Create a chalkboard desk for kids
Convert an old nightstand or table into an interactive workspace by applying chalkboard paint to the top surface. Sand the surface lightly, apply primer, then add 2-3 coats of chalkboard paint. Allow 24-48 hours for curing before letting kids unleash their creativity.
4. Convert a headboard into a bench
Attach the headboard to a simple wooden frame to create the bench back. Build a seat using 1×6 boards for the frame and seat slats. Add decorative elements like scrollwork for character. This project creates functional seating with vintage charm.
5. Use a ladder as a bookshelf
Position an old wooden ladder against a wall or open it slightly. Place wooden planks across the rungs to create shelves for books, plants, or decorative items. For stability, secure the ladder to the wall or add bracing between the legs.
6. Make a coffee table from a crate
Arrange four wooden crates in a square formation with openings facing outward. Secure them together with screws from the inside. Add a plywood base and attach caster wheels for mobility. The crates provide built-in storage while creating a rustic centerpiece.
7. Wrap a file cabinet with fabric
Revitalize a metal file cabinet by covering drawer fronts with fabric. Remove handles and hardware, apply Mod Podge to the drawer face, carefully lay fabric on top, and smooth out bubbles. Once dry, reattach hardware for an instant office upgrade.
8. Add wallpaper under glass tabletops
Apply decorative wallpaper to a plain table, then cover with a custom-cut piece of glass. Start by applying wallpaper from the middle of the table, matching patterns carefully. This transforms ordinary tables into statement pieces with minimal effort.
Tips for Successful DIY Upcycled Furniture Projects
The difference between a frustrating furniture flop and a stunning success often comes down to a few key techniques. I’ve gathered these essential tips to help ensure your upcycling projects turn out beautifully every time.
Start small and build confidence
Beginning with manageable projects helps develop skills without feeling overwhelmed. Try refreshing a side table or stool before tackling larger pieces. Each successful project increases your confidence and develops your creative abilities. Numerous first-time upcyclers report that completing simple projects gives them a confidence boost that lasts for weeks afterward.
Use sealers to protect your work
Always apply a sealer after painting to protect your creation from daily wear. For heavily used surfaces like tables, choose polyurethane for maximum durability. Polycrylic works well for most indoor pieces without yellowing lighter colors, while furniture wax creates a lovely silky finish (albeit requiring occasional reapplication).
Let paint dry fully between coats
Paint may feel dry within hours, but complete curing takes 3-4 weeks. Rushing between coats can cause streaking, uneven surfaces, or muddy color blending. Allow at least 24 hours between coats in humid environments. After completing your project, wait a full week before placing items on the surface.
Fix wobbly parts before decorating
Address structural issues first. Examine for loose joints or uneven legs before starting any cosmetic updates. Strong, stable furniture ensures your creative work lasts longer and functions properly. Tightening loose tenons and reinforcing joints creates a solid foundation for your design vision.
Personalize with stencils or fabric
Stenciling creates professional-looking patterns with minimal equipment. Work with a nearly-dry brush to prevent paint bleed under stencil edges. For fabric applications, use modpodge to adhere textiles to drawer fronts or cabinet doors for instant visual interest.
Conclusion
Upcycled furniture represents far more than just a trendy DIY hobby. Throughout this guide, we’ve seen how transforming old pieces creates unique, personalized home décor while simultaneously reducing waste and saving money. Anyone can start this rewarding journey, even without power tools or previous experience.
The beauty of furniture upcycling lies primarily in its accessibility. As demonstrated, simple hand tools and basic supplies can completely transform tired furniture into stunning statement pieces. Projects like turning chairs into plant stands or headboards into benches prove that creativity often matters more than technical woodworking skills.
Additionally, upcycling creates a personal connection with your furniture that mass-produced items simply cannot match. Each piece tells a story – your story – through your design choices and handiwork. This personal investment typically leads to greater appreciation and longer-lasting furniture.
Therefore, I encourage you to start your upcycling journey today with one of the eight beginner-friendly projects outlined above. Remember to start small, ensure structural stability before decorating, and allow proper drying time between steps. Your confidence will grow with each successful project, eventually leading to more ambitious transformations.
Most importantly, furniture upcycling allows anyone to create a more sustainable home filled with character while expressing their unique style. The satisfaction of saying “I made that” whenever guests admire your handiwork certainly beats pointing to the same mass-produced item thousands of others own.
FAQs
Q1. What is furniture upcycling and why is it beneficial? Furniture upcycling is the process of transforming old or outdated furniture into new, functional pieces. It’s beneficial because it saves money, reduces waste, allows for the creation of unique items, and helps avoid contributing to the “fast furniture” problem.
Q2. Do I need power tools to start upcycling furniture? No, you don’t need power tools to start upcycling furniture. Many projects can be completed using basic hand tools like screwdrivers, sandpaper, and paint brushes. Chalk paint is particularly beginner-friendly as it often doesn’t require priming or sanding.
Q3. What are some easy upcycling projects for beginners? Some easy upcycling projects for beginners include turning a chair into a plant stand, making a nightstand from a bar stool, creating a chalkboard desk for kids, and using a ladder as a bookshelf. These projects require minimal tools and materials.
Q4. How can I protect my upcycled furniture after painting? To protect your upcycled furniture after painting, apply a sealer. For heavily used surfaces like tables, use polyurethane for maximum durability. Polycrylic works well for most indoor pieces without yellowing lighter colors, while furniture wax creates a lovely silky finish.
Q5. How long should I wait between coats of paint when upcycling furniture? It’s important to let paint dry fully between coats. While paint may feel dry within hours, complete curing takes 3-4 weeks. Allow at least 24 hours between coats, especially in humid environments. After completing your project, wait a full week before placing items on the surface for best results.
Disclaimer
Always check furniture for structural stability before use. While these methods have worked well for many projects, results may vary based on materials and techniques used. Take appropriate safety precautions when working with paints, adhesives, and other materials.